
BitBucket Pipeline Prerequisites
- A remote server with SSH access (in this example we’re using a DigitalOcean droplet running Ubuntu)
- A BitBucket account and repository with your site’s source code
Step 1: Setting up a user on the remote server
1.1 Create new ‘builder’ user
We’ll start by creating a new user on the remote server which we will use later in the pipeline to connect via SSH. To do so we need to SSH into our remote server (as any user with sudo privileges) and create the new user which we’ll call ‘builder’ with the following command:
sudo useradd builder1.2 Generate SSH key pair
Whilst it’s possible to establish an SSH connection with just a password, it’s not the most secure method. A better method is to use SSH keys to identify the client to the server. All you need to do is generate an SSH key pair, which includes a public and private key. You can then tell the server what the client’s public key is and it will use that key to encrypt data to send to the client. The client is then able to decrypt the payload with their private key.
You may already be using SSH keys to connect to your server, but in this case we want to create SSH keys on your remote server and give BitBucket the public key. This will enable your remote server to connect to your BitBucket repository, which is necessary so that we can run commands like “git pull” from the server.
In your SSH connection to the remote server, change user to the newly created builder user with the following command:
su - builderWe can add a pair of SSH keys with the following command:
ssh-keygen -t -a -b4096You can then press enter to accept the default location to store the keys, which will be a .ssh folder located in the home directory for that user (~/.ssh).
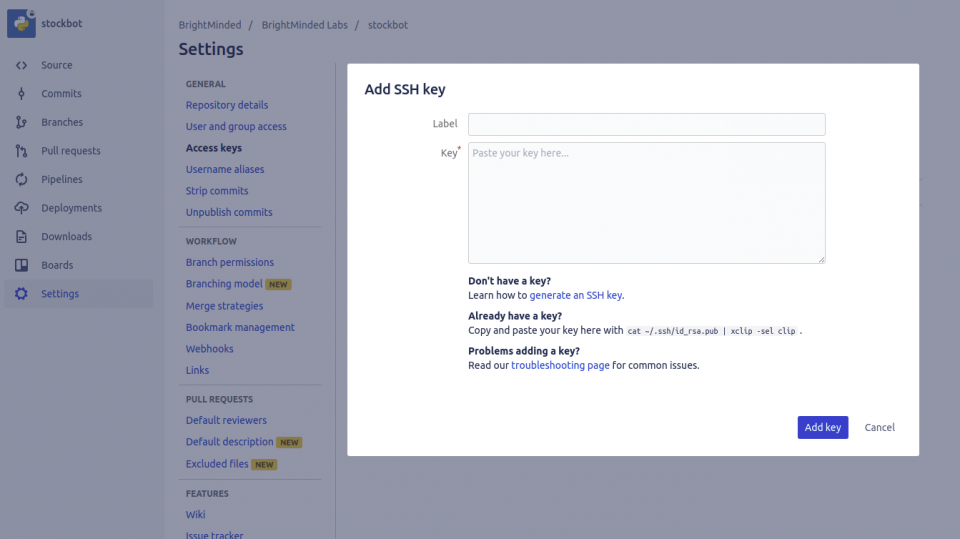
1.3 Add ‘builder’ user’s public key to BitBucket
Now we need to add the newly generated public key to our BitBucket repository so that our new ‘builder’ user can be authenticated. We can do this by opening our repository on BitBucket in the browser and clicking:
Settings > Access Keys > Add key
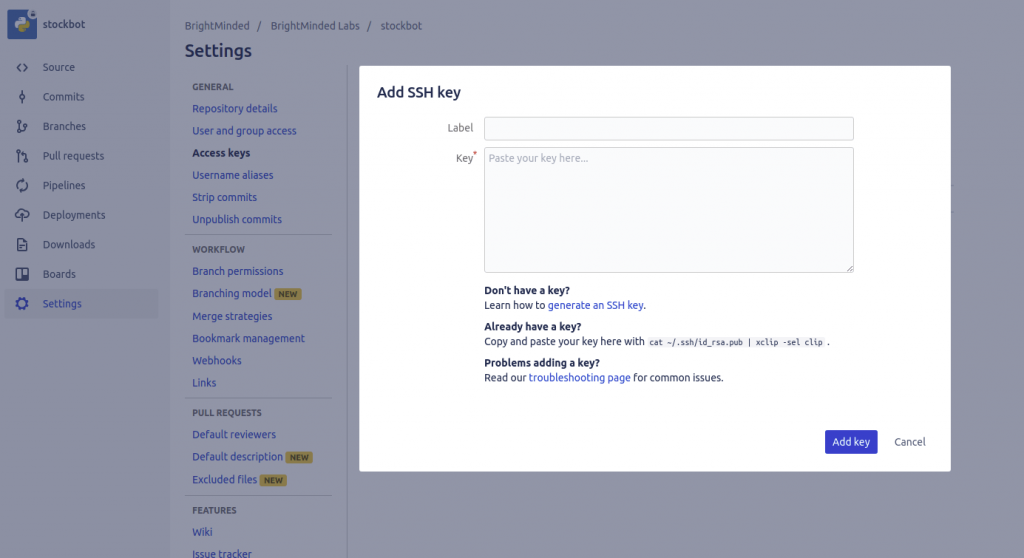
You can then give it a label like ‘builder@’ to identify it for future reference and paste in your new public key. In order to get the public key from the remote server you can go to the .ssh directory and enter:
cat id_rsa.pubThis will output the public key which you can then copy and paste into BitBucket.
Step 2: Setting up the BitBucket Pipeline
2.1 Enable BitBucket Pipelines
Back in our BitBucket repository settings go to Pipelines > Settings and click to enable pipelines. This will generate a file called bitbucket-pipelines.yml and add it to our repository.
Go to “Source” and open the file. It should initially look something like this:
pipelines:
default:
- step:
script:
- echo "Everything is awesome!"
2.2 Modify the Pipeline script
“Default” is the pipeline to the default branch and “script” is what will run whenever we commit to the default branch. When the Pipeline runs, BitBucket will spin up a temporary server and follow the steps in the file. In this case it will run the script which will echo a message in the temporary server’s terminal.
We want to modify the script so that it connects to our remote server via SSH as our new ‘builder’ user, and pull the changes from git (or mercurial), and update.
Click the “Edit” button and modify the file to the following:
pipelines:
branches:
master:
- step:
script:
- ssh builder@[remote server IP] 'cd [location of your site on the server];git pull; echo "Changes deployed!"'
By adding the “branches” and “master” keys we are ensuring that the script within will only run when a commit is pushed to the master branch. If you’re using Mercurial instead of Git then you can replace git pull; with hg pull; and also add hg update;.
2.3 Generate an SSH key pair for the Pipeline
In order for our Pipeline’s temporary server to be able to SSH in to our remote server it needs its own SSH key pair. This is perhaps the most complicated step of the process to understand. We created an SSH key pair on the remote server earlier (step 1.2), so why is this necessary? I mentioned in the previous step (2.2) that BitBucket spins up a temporary server in order to carry out the tasks in the pipeline. It’s this temporary server that is the client in this case, so it needs an identifying SSH key pair in order to connect to your server and run the commands in the pipeline script.
To generate an SSH key pair for the pipeline on BitBucket go to:
Settings > Pipelines > SSH keys and click ‘generate keys’
You can then copy the newly generated public key and add it to the authorized_keys file on your remote server. In your SSH connection to your remote server, go to the builder user’s .ssh folder (cd /home/builder/.ssh) and enter:
echo "<public key>" > authorized_keysThen, back on the BitBucket SSH keys settings, at the bottom of the page you need to add the host address to the “known hosts”. Simply add the IP of the host (server) address and click “fetch” to see the host’s fingerprint.
Now, whenever you push something to the master branch, the script will run which will cause the changes to be pulled on the server.

Conclusion
Setting up pipelines for automated deployment makes deploying changes to your sites a breeze. Once you’ve gone through the initial effort of setting up a pipeline you will have saved yourself a huge amount of time in the long run. Deploying changes is as simple as pushing to a branch, meaning if you need to make urgent changes quickly then there need not be a delay between committing the code and deploying the changes to the server. You can even add other steps to your pipeline such as running tests before deploying.
How can we help?
Do you need support with setting up BitBucket Pipelines or more generally with building out an efficient system set-up?
Our highly experienced team can provide advice on modernising legacy systems, IT architecture, application integrations and other digital improvements.
We focus on delivering fully tailored and user-friendly software solutions to improve business services and increase user engagement.
Give us a call to find out how we can help.